Process Optimization
How to Pressurize Your System Properly and Achieve Flow
Having trouble pressurizing your Comco blaster?
The source of your problem may be an interruption in air flow that then impacts air pressure. In the following video micro-lesson, we look at how to identify and remove restrictions to pressure and flow.

Start at the Beginning
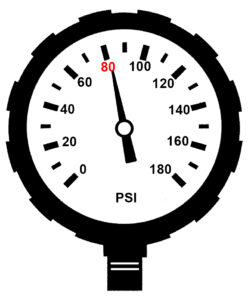
The valves in Comco blasters must connect to a pressure source of at least 80 psi at the inlet valve to function properly. Commit this to memory. Write it down. Post it where you can see it.
At 80 psi, enough pressure can push through the blaster to close the vent pinches and/ or the PowderGate® valve, allowing the tank to pressurize. This means your shop air gauge, directly upstream of the blaster, should read at least 90 psi. Why the approximate 10 psi safety margin? Two factors affect air pressure as it flows from wall to nozzle:
- The volume of air– how much air pushes through the system.
- Loss, leaks, and restrictions– Anything that slows airflow down, sucks it out or gets in its way.
Loss, Leaks, and Restrictions
The path to optimal flow is about overcoming leaks, reducing loss, and removing restrictions. Sounds like a metaphor for life? MicroBlasting is deep, dude.
Overcoming the main leak
The MicroBlasting process consumes air. Before full pressurization, each exit on the blaster allows some air to leak. When the blaster is turned off, the PowderGate valve (the abrasive pinch) and the vent pinch sit open. Once the blaster is turned on, pressure must build in the cylinders quickly to stop air from leaking out of exits and allow the tank to pressurize.
The primary consumption point or “leak” is the nozzle. Pressing the footswitch sends air through the blaster and out the nozzle. As the nozzle size increases and air pressure rises, so does air consumption. The key is to make sure that the supply upstream is greater than the downstream consumption. If air exits the nozzle faster than it can be replenished, the gauge reading on the blaster drops and rattles. Consumption and supply still reach a balance, but at a lower pressure.
Frictional loss
Even if your air compressor is able to generate the required minimum of 80 psi, your MicroBlaster may still struggle to pressurize. Frictional loss describes the pressure that is lost to friction as the air travels from the compressor to the blaster. Smaller diameter hoses have a greater ratio of surface area to volume. More surface area= more friction. More friction= more loss.
Does this mean you should use a 3/8″ industrial supply hose or larger? Absolutely.
Removing restrictions
The blaster design naturally has restrictions or points that interrupt air flow and eat up air pressure. The regulator, the modulator and the mixing chamber consume some air pressure. A slight lag occurs between air flowing out and moving into the blaster. Air pressure in the system drops to reach equilibrium as the regulator processes this slight lag.
If the blaster’s pressure gauge drops 5 psi or less, then the blaster is functioning normally. The regulator is just doing its job.
Should the blaster’s pressure drop 10 psi or more, then the blaster will deliver inconsistent results. Remove any unnecessary restrictions upstream from the airline such as extra valves or regulators and, again, use a supply hose that has an ID of 3/8″ or larger.
Why is Pressure and Flow so Important?
MicroBlasting’s entire aim is to deliver efficient, precise, controllable and repeatable surface alteration. To do this, particle velocity must be controlled at the nozzle. Air pressure and flow control particle velocity. If particle velocity is too low, material removal takes longer and the resulting finish may be uneven. If air pressure fluctuates, so does the Ra of a part’s surface.
As with anything in life, preparation is integral to the success of your blasting journey.
